Creating own caddy image that includes cloudflare plugin with a Dockerfile
Create a file, in this case we are creating Caddy.Dockerfile with the following:
Caddy.Dockerfile
FROM caddy:builder AS builder
RUN xcaddy build --with github.com/caddy-dns/cloudflare
FROM caddy:latest
COPY --from=builder /usr/bin/caddy /usr/bin/caddy
And create a docker-compose.yml with the following:
docker-compose.yml
services:
  caddy:
    build:
      context: .
      dockerfile: Caddy.Dockerfile
    image: caddy-cloudflare:latest
    restart: unless-stopped
    environment:
      - CF_API_TOKEN=
    ports:
      - "80:80"
      - "443:443"
      - "443:443/udp"
    volumes:
      - ./Caddyfile:/etc/caddy/Caddyfile
      - ./caddydata:/data
      - ./caddyconfig:/config
    networks:
      - caddy_network

  your-app-here:
    networks:
      - caddy_network

networks:
  caddy_network:
    driver: bridge
It’s smarter to use docker secrets than the following
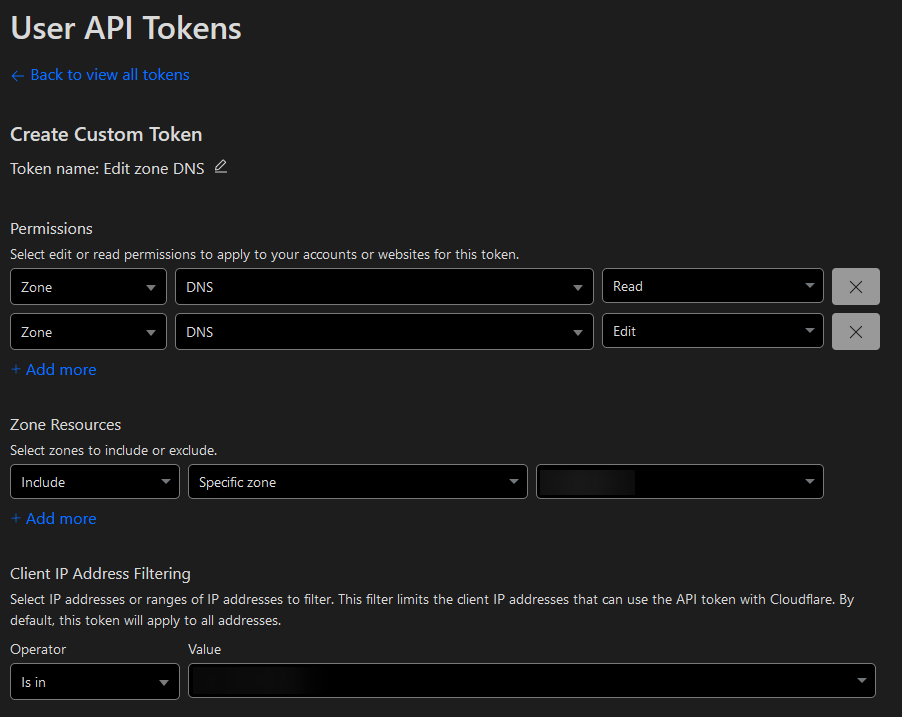
Get your CF_API_TOKEN= from Cloudflare and create a token that only has Edit and Read permissions on the specific zone you would like:
Make sure to add your own app in the your-app-here section in the docker-compose.yml file.
Create the following Caddyfile
Caddyfile
name.example.tld {
  tls {
    dns cloudflare {env.CF_API_TOKEN}
    resolvers 1.1.1.1
  }
  reverse_proxy service-name:1111 {
    header_up X-Real-IP {remote_host}
  }
}
Replace name.example.tld and service-name:1111 with what you’re trying to host.
I have added resolvers 1.1.1.1 because of local DNS, the example.tld is being used internally and would not resolve the DNS challenge.
After that, you build the image, entering the following command: docker-compose up -d --build and waiting until the build is complete.
If you want to update your new docker container, you just run the command docker-compose up -d --build again and it will build it for you.
This is possibly outdated
If you want to improve this and host it on GitHub, a better way is possible with using GitHub runner to build this image and then host the image on your GitHub repo